FIVE Wainwright walk - with a return by bus: Raise, White Side, Helvellyn, Nethermost Pike, Dollywaggon Pike.
Walk Rating:⭐⭐⭐⭐
Time: 4 - 5 hours (then return by bus)
Parking: at Legburthwaite/Stanah (limited free spaces plus fee-paying car parks). Or stop at the Legburthwaite bus stop, on the 555 route from Kendal to Keswick.
 |
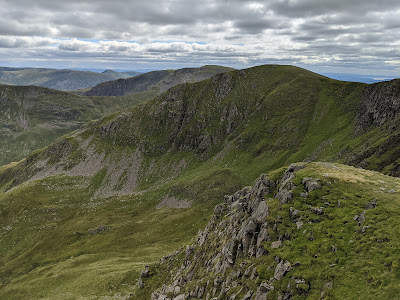
| The Helvellyn ridge from Ullscarf |
Thousands of visitors climb to the top of Helvellyn every year, many via the gentler western climbs Wythburn and Thirlspot, others by more spectacular eastern ascents such as Striding Edge, described in another post. The route I have described here offers a north-south route instead, high along the ridge of the Helvellyn range.
This is a route that offers five separate summits over 2800' in altitude. Starting with the stony summit of Raise, as well as the well-known viewpoint of Helvellyn itself, this walk also adds the less well known, but also excellent, views from White Side, Dollywaggon and Nethermost Pikes. By using the regular bus service that runs over Dunmail Raise, a round trip can easily be made if needing to return to a car left at the starting point of the hike.
 |
| Strava estimates 12km in walking distance |
1. Start at the lane that heads up past the Thirlmere Recreation Hall towards Stanah Farm. Take the path that climbs to a gate at a water channel, crosses over the Stanah Gill, then heads up onto the open fells. Climb the hillside on the path that zig-zags across the grass to the right side of the ravine carved out by the gill.
 |
Climbing up above Stanah
|
2. As you gain height, good views open out behind you westwards over Thirlmere and northwards towards Skiddaw and Blencathra.
 |
| Looking back as you climb the hillside |
3. The path heads away from the gill, passing a sheepfold, and up to the right across a grassy shoulder coming down from Stybarrow Dodd above. Take the path across the sometimes boggy ground across to the top of the next valley across, carved out by Sticks Gill.
 |
| Walking to Sticks Pass, at the top of the next valley |
4. The path comes out at the wide ridge path (but no longer any 'sticks'!) on top of Sticks Pass. Turn right and walk up to the stony summit of Raise.
 |
| Looking north on the summit of Raise |
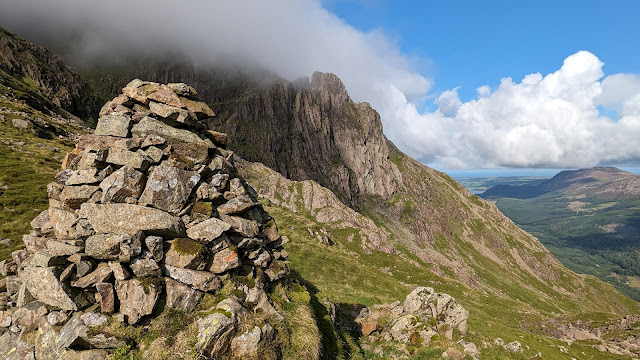
5. The summit of Raise is marked by a large cairn (2897').
 |
| The view towards Swirral Edge from the top of Raise |
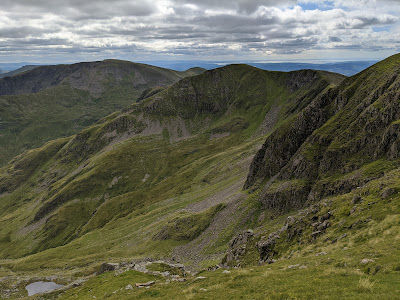
6. Now head south-west along the obvious ridge path, into a slight dip then up to the next high-point on the grassy ridge, White Side. |
Continue along the ridge to White Side
|
7. The summit of White Side (2832') also has a cairn, but one which has been formed into a wind shelter.
 |
| Taking a break in the wind shelter on White Side |
8. Continue onwards, again descending at first, then climb up the long narrowing ridge ahead and, at the end of it, the peak of Helvellyn Lower Man.
 |
| Climb the long ridge up to Helvellyn Lower Man |
9. To your left, look down across Brown Cove towards Catstycam and the Glennridding valley, to the right, back down towards Thirlmere.
 |
| The views as you climb to the Lower Man |
10. The top of the path can be a little loose in places, but there is no particular difficulty in reaching the distinct peak at its top at the top of the ridge. This is "Helvellyn Lower Man", over 3000' in altitude, but, as a subsidiary peak of its parent mountain, not given a separate listing by Wainwright.
 |
| Catstycam from Helvellyn Lower Man |
11. Your route now joins the paths coming up from the west from Thrirlspot and the Swirls car park, and you will probably be joined by many more walkers too. Turn left and walk along the top of the ridge to where it meets Swirral Edge.
 |
| The path descending to Swirral Edge |
12. Continue along the ridge, and you will be rewarded with majestic views over Red Tarn, sitting over seven hundred feet below you, between Swirral and Striding Edges:
 |
| Looking down over Red Tarn |
 |
| Panoramic views eastwards from the top of Helvellyn |
12. The views are tremendous but, depending on the time of year, if you enjoy walking to get away from the crowds, the rest of the summit of Helvellyn might not always be the best place to do it. So, although you could take time to explore the summit cairn, triangulation column, wind shelter and various commemorative monuments, as described in Wainwright's Guide to the Eastern Fells, you may prefer to move on fairly quickly, carrying on southwards along the ridge towards Nethermost Pike, looking back at the walkers on the top of Striding Edge.
 |
| Looking at the walkers on Striding Edge |
11. For the best views, keep to the thinner paths around the top of the cliffs, rather than the main path which is set back from the ridge to give hikers the shortest route up to Helvellyn from Wythburn, to the west.
 |
Looking south to the triangular plateau of Nethermost Pike
|
12. After losing a little height, the cliff top path heads back up to the left, skirting above Nethermost Cove, to reach the top of Nethermost Pike (2920'). There's no obvious summit but, instead, a triangular plateau of grass with cliffs on its two eastern sides. Even on a busy day, a walk around the tops of these cliffs will take you away from the holiday crowds. |
| Catstycam and Striding Edge from Nethermost Pike |
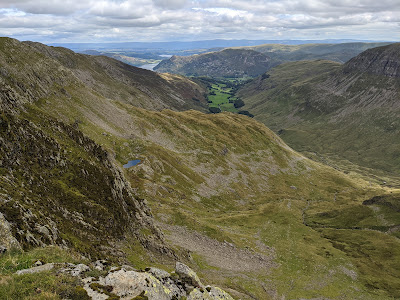
13. Walk to the apex of the triangle, where the eastern ridge of the fell descends down to Eagle Crag, then head back along the edge of the cliffs, south-west, to catch a glimpse of 'Hard Tarn', half way down the steep drop into Ruthwaite Cove.
 |
| Hard Tarn and Ruthwaite Cove will be down to your left |
13. Heading back south, the cliff top route takes you to a small summit cairn on the subsidiary peak of High Crag (2900'). There are views down into Grisedale and south, to the last summit of the day, Dollywaggon Pike.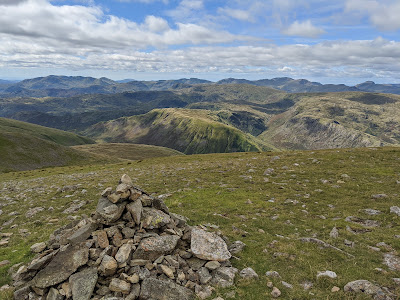 |
| Looking south-west to Dunmail Raise from High Crag |
 |
| Hard Tarn, Grisedale and Ullswater from High Crag |
 |
| Dollywaggon Pike from High Crag |
14. Again, continuing around the top of the cliffs, rather than the main path that is set a little further west on the grassy ridge, walk on towards Dollywaggon Pike, passing a short section of wall set above Ruthwaite Cove.
 |
Looking back to High Crag and the eastern ridge of Nethermost Pike
|
15. Go up the grassy slope to the top of Dollywaggon Pike (2815').
 |
| The grass dome at the top of Dollywaggon Pike |
16. On the summit (2316'), you'll find a large cairn and then, at the highest point along the ridge heading off to the east of the summit, another small cairn. Take in the views around you at this last high viewpoint along the Helvellyn ridge.
 |
| Looking north towards Nethermost Pike |
 |
| Looking north-west towards the Grasmoor Fells |
17. Now descend south-west across the grass and look for an old metal gatepost at a junction with the main ridge path. This has still been running along the ridge but slightly to the west, beneath the high points of the summits. There is now a choice of ways to descend from the mountain. Going left, along the main ridge path, takes you down some more gradual paved zig-zags above Grisedale Tarn (the 'yellow arrows' below).
 |
| A choice of descents from Dollywaggon Pike |
18. Going straight ahead (the 'orange arrow' above) provides a quicker, but steep and slippery descent, along the course of a crumbled wall, directly down the hillside.
 |
| Heading down the hillside |
19. Whatever your choice, your aim is to reach the marshy area just to the west of Grisedale Tarn. From here a clear path heads along the little valley carved out by the Raise Beck, down to the main road at Dunmail Raise.
 |
| Fairfield, on the far side of Grisedale Tarn |
20. The path down, which keeps to the left (southern) bank of the beck is obvious, although there a couple of steep sections that need more careful placement of your boots. Here, however, you are more than compensated by the cascades made by the water also descending steeply alongside you.
 |
| Waterfalls on the Raise Beck |
21. You will start to glimpse the main road crossing Dunmail Raise below you, with the eastern flank of Steel Fell rising steeply behind it.
 |
| Looking down to Dunmail Raise |
22. As the valley opens out near the road, if you want to visit the Dunmail Raise cairn, head over to the right and follow the wall down to the main road. If you want to head to the the bus stop, then bear left across the bottom of the fell. You can stay on a path across the grass, instead of walking onto the roadside, all the way to a stile that crosses the fence just before a house next to a lay-by.
 |
| Head across the bottom of the fell for the bus stop |
23. Here, as long as it's still standing, you can also find the well-known old AA box, and close by, on both sides of the road, bus stops for buses to take you back to Legburthwaite or down to Grasmere. It's worth having the Stagecoach App on your phone to track the progress of the next bus so you know how long you have to wait!
Worth knowing: Dunmail Raise is usually driven over at speed by locals and tourists alike on their way to somewhere else but there's plenty here that's worth stopping to explore. Most importantly, stuck in the central reservation in the short section of dual carriageway at the top of the pass, is the large cairn of stones from which the pass gets its name:
 |
| Dunmail Raise - looking north |
This pile of stones is reputedly the funeral cairn of the Cumbric king Dyfnmal ap Owain (aka 'Dunmail'), defeated here in battle in 945AD by the combined forces of Saxon King Edmund and Malcolm of Alba. It's quite possible that there was such a battle but whether the cairn marks Dunmail's grave is a matter for scholarly - and internet - debate.
 |
| Dunmail Raise - looking south |
It seems most likely that the stones acted as an ancient boundary marker between Westmorland and Cumberland, but then became associated with the legend of Dunmail. The story was later embellished to include tales of his crown being thrown into Grisedale Tarn by his retreating followers. The cairn has been disturbed by road builders over the centuries but remains standing today at the top of the pass.
 |
| The pillbox guarding the southern approach to the pass |
The cairn is not the only thing worth looking for. If you walk across the hillside south, above Raise Beck and below Steel Fell, you can find an old second world war pillbox built to guard the southern approach to the pass from invading forces. On the road itself, a few hundred metres to the south of the top of the pass, you should be able to find one of the last remaining AA boxes, Box '487'. It used to allow stranded AA members to seek help if broken down on the pass. Sadly, it was blown over in the winter of 2021/22 and was clearly in need of repair in February 2022:
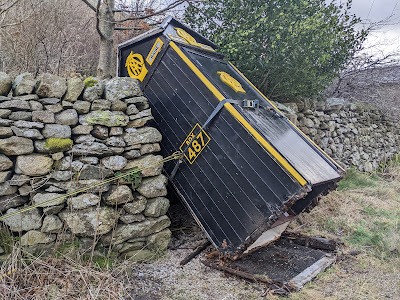 |
| The damaged AA box in February 2022 |