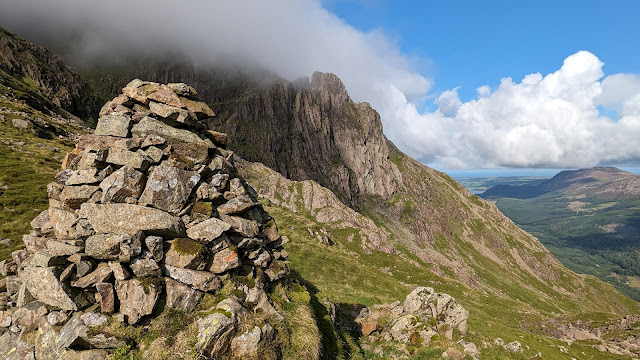
SEVEN Wainwright circular walk: Dow Crag, Coniston Old Man, Brim Fell, Swirl How, Great Carrs, Grey Friar, Wetherlam.
Walk Rating:⭐⭐⭐⭐
Time: 7- 8 hours
Parking: paid parking at the Walna Scar Road (Grid Ref: SD 289 971) but do arrive early to find a place, or some free parking at the roadside at Bowmanstead, to the south of the village. Alternatively, take the 505 bus from Ambleside.
 |
| Wetherlam from Elter Water |
The Coniston Fells are a much-loved area for serious walkers and day-trippers alike. For holidaymakers, the walk up to the top of the Old Man of Coniston provides a genuine experience of a real mountain summit. But for those who want to explore further, all the adjoining fells are well worth a visit, and can be reached on paths that take you away from the crowds at the top of the Old Man. The route below suggests a number of variations to choose from.
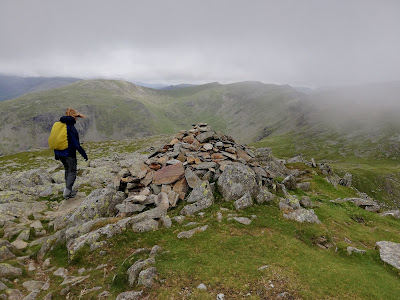
The scenery provides memorable views in the sunshine but can also be dramatic when the clouds are lower over the fells. If the rain has really set in, then there is plenty to visit in and around Coniston itself, not least the industrial landscapes left from centuries of copper mining in these fells.
 |
| Strava suggests a walking distance (depending on route option ) of around 22 km, and about 1,400m in total elevation |
From Walna Scar Car Park
1a) If you are cutting out some of the 'hard yards' by driving up to the Walna Scar car park, then turn right after the petrol station in the village, onto Station Road. The road goes uphill and then sharply left, with a signpost directing walkers to the 'Old Man' and 'Walna Scar'. The road goes very steeply upwards through the trees. It then levels out and goes across the open countryside for about a mile before reaching the car park at its end. Be warned, the road is narrow with limited passing places and it's worth checking with any returning traffic whether the car park still has available spaces or not! This is also the most straightforward route on foot from the centre of Coniston.
 |
| The signpost directing walkers to Walna Scar |
2a) From the car park, ignore the paths heading left and right near the entrance gate. Instead, continue straight ahead on the stony Walna Scar Road, or perhaps 'track' would be more accurate, running under the southern slopes of the Old Man of Coniston. When you reach the shallow, overgrown 'Boo Tarn', ignore the quarry track and footpath heading up the hillside to your right, signposted to "The Old Man" in white paint on a rock. Instead, continue onwards around the bottom of the fell on the main track.
 |
| Ignore these routes and continue on the main track |
From the A593 to the south of Coniston
1b) If you are starting out to the south of the village, then a more interesting walking route can be traced by crossing the route of the old railway and then making your way along clear paths that lead you westwards out into the marshy ground to the south of Coniston Old Man.
 |
| In the fields to the west of the main road in May |
2b) Cross the wall running south from the Walna Scar Car Park on a ladder stile, then head towards the slopes of the 'Old Man' where you will meet the Walna Scar Road somewhere near the "Well in Crag" spring.
 |
| Cross the wall running south from the Walna Scar car park |
Along the Walna Scar Road
3) After the "Well in Crag" spring, the Walna Scar Road starts to climb the hillside. The top of Brown Pike begin to appear on the horizon ahead of you.
 |
| Brown Pike appears on the horizon |
4) The track climbs to a junction marked with wooden posts where a clear path heads up to the right. Continuing on the track takes you onwards, over the stone 'Cove Bridge' with its added metal fencing, and upwards to the Walna Scar pass. Heading right on the path takes you up to Goat's Water and Goat's Hawse.
 |
| Make your choice at this junction of track and path |
Via Walna Scar and Brown Pike
5a) This choice of route gives you the best views from the ridge of Dow Crag down over Blind Tarn and Goat's Water. Continue on the Walna Scar Road track as it now starts to climb steeply up to the Walna Scar pass, to the south of Brown Pike. The impressive ridge that ends in Dow Crag will be up to your right.
 |
| The Walna Scar Road to the left of Brown Pike |
 |
| Heading up towards the Walna Scar pass |
6a) When you reach the pass (at 1995'), leave the track to head right on the clear path heading up the ridge, firstly to Brown Pike (at 2237') and then up further to Buck Pike (at 2441'). Between these two subsidiary peaks, you will be able to look down onto 'Blind Tarn', hidden otherwise from view in the steep slope to your east.
 |
| Looking down over Blind Tarn |
7a) From Buck Pike, the ridge path continues onto the top of Dow Crag itself. There are good views to the 'Old Man' across Goat's Water, 900 feet below you, sometimes peering through the gaps made by the deep gullies carved into the eastern walls of the crag.
 |
| The 'Old Man' and Goat's Water from Dow Crag |
Via Goat's Water and Goat's Hause
5b) This choice of route takes you alongside the eastern bank of Goat's Water and offers good views of the buttresses of Dow Crag that tower above it. Before reaching 'Cove Bridge', leave the track and take the clear path on the right that goes up into the wide depression of 'The Cove', underneath the ridge leading northwards to Dow Crag.
 |
| Walking across 'The Cove' |
6b) The path then climbs again to reach the elongated tarn of Goat's Water. Dow Crag towers upwards on the opposite side of the water. Wait a while to look at the crags above you and perhaps some climbers making their way up the rock faces.
 |
| Dow Crag above Goat's Water |
 |
| Climbers on Dow Crag |
7b) Continue beyond Goat's Water and climb the path, largely paved although the stones have been eroded in places, up to the dip in the ridge above you, Goat's Hawse. Now turn left and walk up along the ridge to the top of Dow Crag.
 |
| Looking up to Goat's Hawse |
 |
| Looking back as you climb up to the Hawse |
Dow Crag to the Old Man
8) It's worth taking time to carefully explore the area around the summit of Dow Crag (2555'), and look down amongst the crags and gullies. Then, to continue to the 'Old Man', head down the slope to Goat's Hawse, with Goat's Water below you on your right.
 |
| A panorama from Dow Crag to the Old Man |
 |
| Heading down to Goat's Hawse |
9) As you cross the Hawse, it's worth taking a few extra paces to your left to take in the view north-west to the Scafells and Bowfell. On a clear day, these peaks will remain silhouetted against the northern horizon for much of the walk.
 |
| The Scafells over Grey Friar, from Goat's Hawse |
10) On the other side of the Hawse, take the clear path that climbs up the opposite slope and then bends up to the right, climbing the grassy flank of the Old Man. You won't actually be able to see its peak until you have reached the summit ridge above. Instead, just follow the clear path and its clear line of cairns up the hillside. The buttresses of Dow Crag still look impressive to your right.
 |
| Heading up the path towards the top of the Old Man |
 |
| Dow Crag will now be to your right |
11) When you reach the summit ridge, suddenly a new vista opens out in front of you, looking down towards Coniston Water and the Coppermines Valley and with the summit of Coniston Old Man standing proudly at the end of the ridge, to your right.
 |
| The ridge runs onwards to the summit of the Old Man |
12) Walk to the summit (2633') where you'll find the raised platform at its top, together with a substantial cairn built upon it. A triangulation column also stands separately a few yards away. The views down over Low Water and along the ridge of Brim Fell are spectacular.
 |
| On the summit of Coniston Old Man |
 |
| Looking down over Low Water towards Wetherlam |
 |
| The Scafells and Brim Fell beyond the OS column |
To Brim Fell
13) Retrace your steps towards the top of the path you took up from Goat's Hawse, but this time keep right, to follow along the top of the ridge, northwards. The fine views continue to your right, looking out towards Coniston Water.
 |
| Looking down to Coniston Water |
14) The official path stands a little way to the left of the steep drops and is clearly marked by a line of small cairns.
 |
| Cairns mark the clear path north to Brim Fell |
15) In ten minutes easy walking along the ridge, you'll reach the well-built summit cairn of Brim Fell (2611').
 |
| The summit cairn on Brim Fell |
To Swirl How
16) A subsidiary ridge drops eastwards from Brim Fell, to end in the buttress of Raven Tor. However, our still clearly cairned path continues gently northwards before dropping down into the depression of Levers Hawse.
 |
| Views across Levers Hawse |
17) At the hawse, if you walk a little to the left of the main path, you can look out over the reservoir of Seathwaite Tarn and the rocky summit of Harter Fell.
 |
| Seathwaite Tarn to the west of Levers Hawse |
18) To your right, with particularly good views as the path climbs the steeper slopes on the other side of the hawse, you can look down over another tarn, long since dammed to become a larger reservoir, Levers Water.
 |
| Levers Water and Coniston Water |
19) The ridge path continues northwards along the edge of the steep slopes overlooking Levers Water, climbing first Little How Crags, and then up again to the rocky top of Great How Crags.
 |
| Looking both ways along the ridge from Great How Crags |
20) The path then continues northwards along the ridge towards Swirl How. Look out to your right for the rocky 'Prison Band' ridge descending to the 'Swirl Hawse' col at the top of the valley below. Your route will continue in this direction later in the walk.
 |
| The 'Prison Band' descending to Swirl Hawse |
21) The ridge now levels out into a wider, rocky plateau, which really marks the geographical centre of the Coniston Fells. This is Swirl How. Its summit is marked by an impressive cairn, perched above the steep drop to its north (2630').
 |
| The summit cairn on Swirl How |
 |
Great Carrs from the top of Swirl How
|
To Great Carrs and Grey Friar
22) From the summit cairn, head down left, to the west. In front of you there will be a wider area of grassland with the summit of Grey Friar, another peak to be reached on this walk, behind it. The route describes here opts to first head to Great Carrs, then secondly Grey Friar, before returning up to Swirl How. However, you could choose to walk this small loop the other way around instead.
 |
| Grey Friar ahead of you as you walk towards Great Carrs |
23) Great Carrs is only ten minutes walk from Swirl How. To reach it, simply follow the path that now bears right, along the final curve in the ridge. A hundred metres or so before you reach the summit cairn, you'll first pass a memorial to eight crewmen who died when a Halifax bomber just failed to clear the ridge in October 1944.
 |
| The memorial on Great Carrs, with Grey Friar behind |
24) The summit cairn of Great Carrs (2575') is perched above the steep drop down into the Greenburn valley.  |
| Looking into Little Langdale from the top of Great Carrs |
 |
| Looking back towards the summit of Swirl How |
25) In contrast to the precipitous drop to its east, the western side of Great Carrs shelves gently down towards a col marked as 'Fairfield' on the OS map. To reach Grey Friar, walk down this grassy slope to the col. To your right, you will be looking across the deep valley of the Wrynose Pass, which provides an alternative route of ascent/descent to this northern end of the ridge of Coniston Fells.
 |
The Scafells, across the Wrynose Pass
|
26) From the col it's an easy walk up the north-eastern ridge of Grey Friar to its stony summit (2536'). There are two different summit cairns, on outcrops a short distance apart from each other.
 |
| Looking across the Duddon Valley to Harter Fell |
 |
| Looking south to the Old Man and Dow Crag |
To Wetherlam
27) Go back down the ridge of Grey Friar to the Fairfield col but, if you have already visited Great Carrs, now take the direct path across the grass back to Swirl Hows. After a last look around its summit area, walk east to find the top of the clear path that starts down the rocky 'Prison Band' ridge towards Wetherlam.
 |
Wetherlam with the 'Prison Band' ridge in the foreground
|
28) The 'Prison Band' takes longer to descend than you might expect because the ridge consists of a series of rocky outcrops. So, while the path is obvious, the going isn't always straightforward, particularly if the path is icy. However, in about twenty minutes or so, you will reach the large cairn marking the col of Swirl Hawse.
 |
| The large cairn on Swirl Hawse |
29) To ascend to Wetherlam, take the clear path heading up the other side of the col and walk eastwards, below the subsidiary peak of Black Sails, across to the pile of stones on its rocky summit (2502').
 |
| At the summit of Wetherlam |
Back to Coniston - via Lad Stones
30a) There are a number of routes back to Coniston from the top of Wetherlam. The simplest is to return along the grassy ridge to the east of the mountain, heading southwards towards Coniston Water.
 |
| Returning along the southern ridge |
31a) Coniston Old Man and Levers Water will be in view to your right, over the Black Sails ridge (which provides another possible return route).
 |
| Looking over to Levers Water |
32a) The path then leads to the end of the ridge at 'Lad Stones' before descending steeply to the left, down the hillside into the main valley, bringing you out on the main mine road near a row of cottages, downstream from the YHA Youth Hostel.
 |
| The path continues to the end of the ridge |
Back to Coniston - via Levers Water
30b) A good alternative descent is to go back down to Swirl Hawse and then head south along the valley, towards Levers Water. This is also the way down, of course, if you have decided on reaching the hawse previously that you haven't the time or energy to include Wetherlam in your walk!
 |
Levers Water ahead as you leave Swirl Hawse
|
31b) The path is very clear at first but then becomes a little less distinct as you cross marshy ground above Levers Water. However, the general direction to take is clear and you will easily find you way to the left bank of the tarn (or, in fact, reservoir, as is clear when you reach the low dam wall).
 |
| Looking across Levers Water from the path |
32b) After the dam, the way ahead is on a track that takes you down through the Coppermines Valley, past the remains of centuries of mineworking. First you pass the area that was once the site of Paddy End Mill and then, further down the valley, the site of the Bonsor Mill. Here there are various restored buildings, including the white building that is now the YHA Hostel, once used as the mine manager's office.
 |
Heading down to the site of Paddy End Copper Works
|
 |
| Continue down the the track towards the YHA Hostel |
33) The wide mine road continues to follow the beck downstream from the area of mine buildings until, at a point where the track starts to bend east, away from the beck, you need to cross right to the other bank over the 'Miner's Bridge'. From here you can walk down the western bank on a track into Coniston, coming out by the Sun Hotel, close to where the road leaves the village for the Walna Scar car park.
 |
| The Sun Hotel, Coniston |
Worth knowing: The area around the Coppermines Valley is worth a full day's exploration of its own. However, it's worth going with a dedicated guide book, to know where to go and what you are looking at, but also to make sure you are not putting yourself in any danger if you go too far off the beaten track - there are many dangerous deep shafts dotted around the old workings.
 |
| The entrance to an old level under Kennel Crag |
 |
| The restored water wheel at the Coppermines Cottages |
As you walk around the area, particularly near to the Youth Hostel, you will find information panels telling visitors about the industrial archaeology around them: